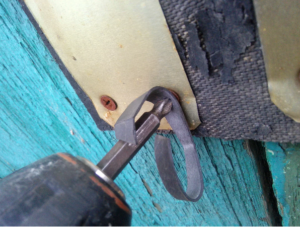
Probably, each of us had to unscrew a screw that does not get out. As a rule, the cause of this phenomenon is rust that has eaten the slot on the head. Our unsuccessful attempts to unscrew such a screw lead to the complete eating of the slot.
Therefore, while there is at least a small semblance of a slot, let's still use it.
1. Heating.
If the self-tapping screw is “settled” in a tree or plastic, be sure to use the following technique.
- Heat the head of the screw with a soldering iron in plastic - 3-5 seconds, in wood - 15-20 seconds.
- Having removed the soldering iron to the side, immediately try to unscrew the screw. Press the screwdriver or screwdriver firmly against the self-tapping screw and with a sharp rotation try to rip it off.
If the self-tapping screw is in plastic, then when it heats up, it melts the plastic around itself and further unscrewing does not present any difficulty.
If the screw is in a tree, then heating leads to charring of the wood in contact with the screw. In addition, heating leads to a slight expansion of the self-tapping screw (and the surrounding wood as well), and after cooling, there is not such a tight contact between the wood and the self-tapping screw.
If the screw is in the metal, then after heating, you need to let it cool. The heated self-tapping screw slightly expanded the hole in which it is located. The grip is no longer so strong.
2. Substrate.
If the splines aren't completely gone yet, try putting some of these materials between the screwdriver and the splines:
- rubber;
- the hard part of the washcloth for washing dishes;
- scotch.
Firmly press the screwdriver or screwdriver and turn it sharply.
3. Pasatizhi.
If the surface around the head of the screw does not need to be kept intact, then you can use a chisel to make a small indentation. Now grab the hat with pliers and unscrew it.
4. Impact screwdriver.
This tool will help if the splines are (again) partially intact. You can use the factory or homemade. You can read about how to make a homemade impact wrench screwdriver in a previous article.
5. Make a cut for a straight screwdriver.
As in the pliers method, if the surface is not necessary to preserve, then you can make a straight cut with a hacksaw for metal in the head of the self-tapping screw. After that, use a wide straight screwdriver.
Modern self-tapping screws are hardened and the hacksaw “takes” them very badly. But the old Soviet screws lend themselves very well to this procedure.
In the photo, just such an "ancient" screw.
6. Drill out.
This method is suitable if the self-tapping screw is the last or only one that fastens two surfaces. If there are no slots at all, and the surface needs to be preserved, you can drill out the head of the self-tapping screw. But remember that the self-tapping screw has been hardened, so drilling will not be easy.
Having drilled the head, we will only have a threaded rod. The bonded surfaces can now be separated. In one of them, a part of the self-tapping screw will remain sticking out, which can now be unscrewed with pliers.