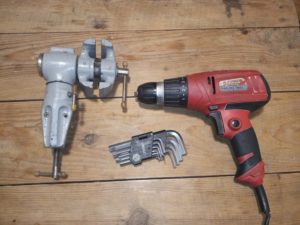
Before talking about one of the ways to remove the chuck from a screwdriver, I want to immediately indicate - "Why is this even necessary?"
The first reason is the failure of the cartridge itself. Accordingly, you remove the cartridge to replace it with a new one. This malfunction happens very rarely, so you are unlikely to dismantle it for this reason. Although…
The second reason is that you have a keyless chuck and you want a keyed chuck. Or vice versa - change the chuck with a key to a keyless one.
The third reason is the most common. You have some problems with the screwdriver gearbox, and it is impossible to disassemble it without removing the cartridge. This is where this method of removing the cartridge from the screwdriver comes in handy.
The fourth reason is that you are making some kind of homemade product, which will be based on this screwdriver. But the cartridge in your design is not needed. Well, what are you inventing there - only you know :)
So, get down to business!!!
Screwdriver chuck removal technique.
To implement this method, you will need:
- vise
- hex wrench (any)
- crosshead screwdriver
This method can only be implemented if the screwdriver motor is working.
Lower the chuck jaws into the chuck. To do this, switch the screwdriver to "reverse" and holding the front clutch with your hand, press the "Start" button. Sponges themselves will "drive" deep into.
Now you have access to the screw, which is located in the depth of the cartridge (photo below).
It needs to be unscrewed.
Unload it with a Phillips screwdriver.
But!!! I want to draw your attention to the fact that this screw has a left-hand thread and you need to unscrew it CLOCKWISE.
After unscrewing this screw, try not to LOSE it. Finding a new screw with a left-hand thread and a countersunk head will be very problematic.
Now clamp the hex key in the chuck as shown in the photo below.
Clamp the key in a vise.
Switch the screwdriver to "reverse"
Set the torque regulator to the drilling mode (on the symbol in the form of a drill).
Grasp the handle of the screwdriver firmly and sharply press the Start button .
If you have done everything in accordance with the above points, the screwdriver will unscrew its cartridge itself.
To install the cartridge in place, you need to perform all these steps in reverse order. In this you will definitely not have difficulties.
Just don't forget to replace the left-handed screw!
For more information about the process of removing the cartridge, you can see in this video: